Improved Pannier Latches

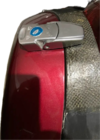
As shown in earlier pictures that I fit exterior latched to my large pannier lids. I was forced to opt for the solution after one side failed to get released and /or unlock latching mechanism stopped working.

However, I was lucky enough to secure a set of slim pannier lids in the same color as my bike. I will definately be reinforcing the plastic bosses.

However, any advice on servicing the existing pannier locking mechanism??
 
I went a different route with my repairs. After removing the bag from the bike(what a pain) I simply drilled through the boss on the non lid side and used a through bolt/nut to hold the mechanism secure. A 10/32 button head bolt head ends up just above the gasket surface. For the lid side, I am using the epoxy reinforcement tip to strengthen the screw boss. Time will tell if it holds up.
Hi All,

Just a quick update, got my latches from china (https://www.aliexpress.com/item/32616694470.html?spm=a2g0o.cart.0.0.65a638daP0A9Z1&mp=1)and following templates.

Latches seems to be of good quality with almost same specs as owatch / Southco V7-20- 101-50 latches. The price was also decent, however, delivery took 25 days.

I will use following provided templates and will report back :)


View attachment 20395View attachment 20394
 
I did the same thing coastie, all 4 bosses were broken off my RH bag body where the latch attached when I bought the bike. Took the body off and glued them back then discovered they were all stripped out as well, so I drilled through with bolts and nuts same as you

Another possibility I thought of after was to get JB weld plastic putty and fill in the bosses then tap them with the stock screws. Don't know how well this would hold but I know the bolts should.
 
Yes, I drilled the pannier lid bosses and epoxied in threaded brass tubes on one set of lids and epoxied all thread in on my original lids. If you use all thread go small so there is room for the nut to turn and tighten and not interfere with the latch loops.
I think using metal and not a screw in the plastic is a good improvement.

Arknt
Yes, indeed! Had Honda chosen to use molded in threaded inserts and machine screws none of us would be having this conversation. No one gave a thought in the design phase that self-tapping screws stress the medium they are in and that plastic is subject to embrittlement over time. I just wonder how much the actual extra cost would have been to use threaded inserts and machine screws?

Mike
 
gr8.. how are the threaded brass tubes holding up?

Also, can I request pictures of both fixes....

My left side latch has broken and I am thinkign of 1) external latches OR 2) this internal fix...
 
No one gave a thought in the design phase that self-tapping screws stress the medium they are in and that plastic is subject to embrittlement over time.
Oh they did, back in the day though...

On the ST1100 fairing (D&D in the late 80ies, introduced '90...) threaded expanding brass inserts do exist...

Spreizmuffe HETTICH M4 5 mm.jpg


Lack of such concepts in today's product is just a sign of the times...

I have already played with the thoughts of upgrading the lids of my GF's NT700VA in this manner...
 
I don't have any pics that show the threaded inserts and I don't have the NT any longer. I used them without issue for a few years. I never had to go farther than that and add external latches.
Another thing to be careful with if adding inserts is to get the height correct so the latch loops click in the latches snuggly but not having to force anything.

Arknt
 
After several go-arounds with many other members regarding the external latches that I choose to install on my bike. I decided to replace them with a sleeker and motorcycle in appearance latches.

I settled on some latches made by OWACH Industrial Hardware available on Amazon, OWACH - CL-307-2L. The locks on these have 3 tumbler plates in the insert and the provided key fits loosely. Security is better than the ones that these replaced.

Here are several pictures of one of these that I installed last night.

View attachment 13346, View attachment 13347, View attachment 13348, View attachment 13349

These were installed using 1/8" Pop Revits with a 1/16" thick backing plate for rigidity.

I hope that these are more to everyone's liking. I got ripped on the last one that I used.

Let me know what you all think.
How did you install them? I've bought 4 of almost identical ones (but smaller?), and I only got the latches, no idea how I'm supposed to line everything up
 
Hi Everyone,

I am going to install the latches tomorrow... the epoxy solution while it has stood up, but the latches seem to have their won mind now on when to pop up :)

1) Can anyone post how the inside pannier part looks like ..

2) I read of string and knot trick to line up the inside aluminum plate ...what is that

3) I have read that the lid should be as tight as possible, but realistically, what is the gap between the lids lip and the pannier edge ...

Note: if you epoxy the nut bosses before they break, that will work hold up fine. My mistake was waiting too long ...

TIA
Hi Sunny, I don’t have any photos of the inside of my panniers, but what I did - and everyone has their own what works for me - is I bent the inside backing plate to match the curve of the inside surface and cut a thin rubber strip as a backer. After the rivets cracked the plastic 😖 I replaced them with small countersink bolts with lock nuts. Over 10k of loaded panniers and still going strong. The whole area is also backed up by my carbon fibre crack repair so it’s an extra layer of assurance.
1727394106454.png1727394106454.png
Mark
 
Hi Sunny, I don’t have any photos of the inside of my panniers, but what I did - and everyone has their own what works for me - is I bent the inside backing plate to match the curve of the inside surface and cut a thin rubber strip as a backer. After the rivets cracked the plastic 😖 I replaced them with small countersink bolts with lock nuts. Over 10k of loaded panniers and still going strong. The whole area is also backed up by my carbon fibre crack repair so it’s an extra layer of assurance.

Mark

Thanks,

Can I request you to share the pics of the inside.

Also, did you use the rubber backing both on the outside (under the latch) and on the inside under the backing plate.

TIA
Sunny
 
Hi Sunny, I don’t have any photos of the inside of my panniers, but what I did - and everyone has their own what works for me - is I bent the inside backing plate to match the curve of the inside surface and cut a thin rubber strip as a backer. After the rivets cracked the plastic 😖 I replaced them with small countersink bolts with lock nuts. Over 10k of loaded panniers and still going strong. The whole area is also backed up by my carbon fibre crack repair so it’s an extra layer of assurance.
View attachment 22298View attachment 22298
Mark
My complements on the carbon fiber repair! Very workmanlike!

Mike
 
Very sad and frustrated to report that I cracked the pannier plastic 😫😭😢

measured 5 times then cut, did every thing with a delicate hand .. but :shrug1::shrug2:

was looking forward to riding it tomorrow ... I had just done all the plastics and put in a new battery ........

Any ideas on how to keep the pannier closed with no latch? I don't think Duck-tape will hold for a 100mile ride ...
Get Gorilla Duct Tape, it will hold for months.

If you have a ROK strap, open the pannier and slip the loop end up thru the crack between the lid and the body. Attach a carabiner (or similar device) to the loop in the pannier preventing the loop to pull back thru. Attach the other half of the ROK strap to the grab handle. Close the lid and snap the two halves together and adjust the straps to the proper tension. This has served me well in an emergency.

Mike

Thanks Mike ... i don't have ROK Straps , but I have these quick loops (https://a.co/d/j8GgheQ) that are used to add tie down points to cars for tie-ing down luggage .. and some luggage straps ...

Thanks for saving the day .... :hat1::wave1:
 
Thanks Mike ... i don't have ROK Straps , but I have these quick loops (https://a.co/d/j8GgheQ) that are used to add tie down points to cars for tie-ing down luggage .. and some luggage straps ...

Thanks for saving the day .... :hat1::wave1:
You should be able to improvise something with those.

Mike
 
Any thoughts on using glue (the type that holds car logos to the car) to attach these latches instead of screws,rivets, etc? Think I might try it.
 
Back
Top Bottom