NoNTnow
Guest
All,
I purchased the Skidmarx Lower Cowl, had it color matched, and now have finally gotten installed and a test ride with it completed!
The cowl was very well packed and arrived in great shape. The fiberglass used is a very high quality and the outer gel coat was excellent. I play around with classic Corvettes and have seen a lot of fiberglass parts and Skidmarx gets very high marks from me for their quality. My body shop did not need to do much preparation work and was also impressed with the fiberglass quality.
The cowl arrives with a large bag of bolts, nuts, washers, brackets and minimalist instructions. That is the first area Skidmarx could improve on in my opinion. However after I sat down at the kitchen table and divided everything up in to the appropriate "piles" it made sense. Follow the instructions and you will be fine...
A few installation tips:
1. The heat shield insulation provided with the kit is a total PITA! It is supposedly self adhesive but it does not want to stick, even to its self! I will be buying some better heat shielding and installing it as the supplied stuff is not going to stay in place long. Reynolds Wrap and Gorilla Snot (Glue) would work better!
2. There has been a lot of questions about radiator hose clearance, or lack there of, on different cowls. The Skidmarx lower subframe easily clears all the hoses as long as you run its mounting bolt from left to right. This means you have to fish the long bolt through the hoses but it can be done with a little patience.
3. The supplied directions say to mount both the left side and ride side units prior to tightening the lower subframe bolt. Save yourself a lot of aggravation and just align it and tighten it with the right side off, left side on. I have a fairly well stocked tool set and there was no way I could get a wrench or socket behind the exhaust to tighten the nut with the right side attached.
4. You will need a good set of metric Allen wrenches. I think I used five different sizes of Allen wrenches and a 10MM socket and combination wrench to put it all together.
How does it work? Very well! I just got from a nice ride and the amount of wind around my lower legs was greatly reduced. It mounts in such a way you don't notice it when riding as it easily clears my jungle boots (10 1/2 EEE sized).
How does it look, well looks are subjective so here are a few photos for you to decide...
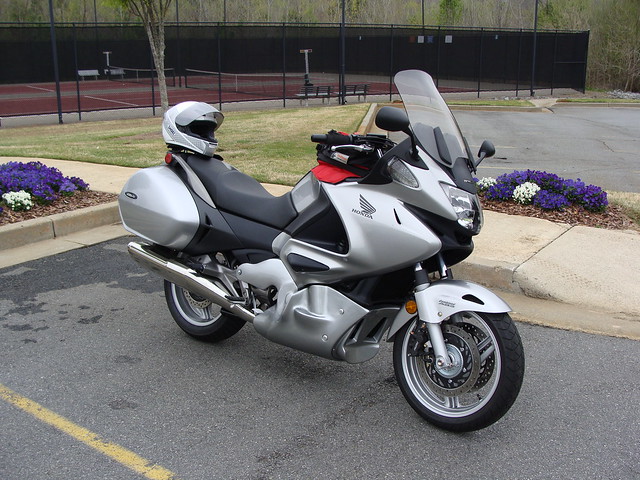
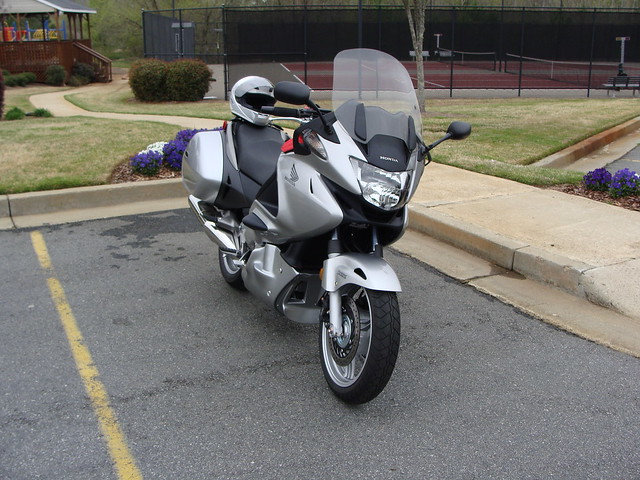
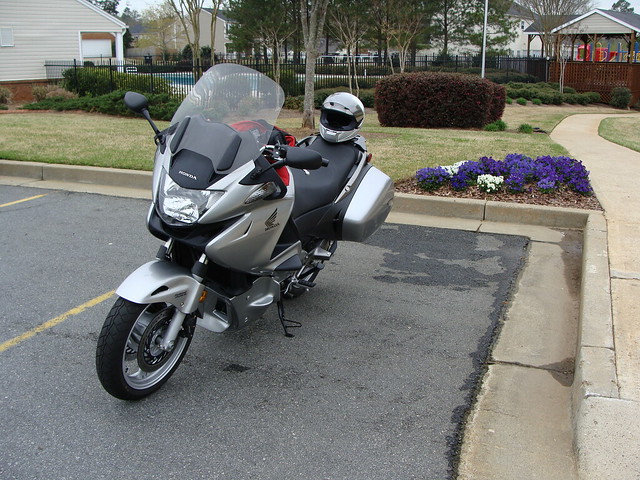
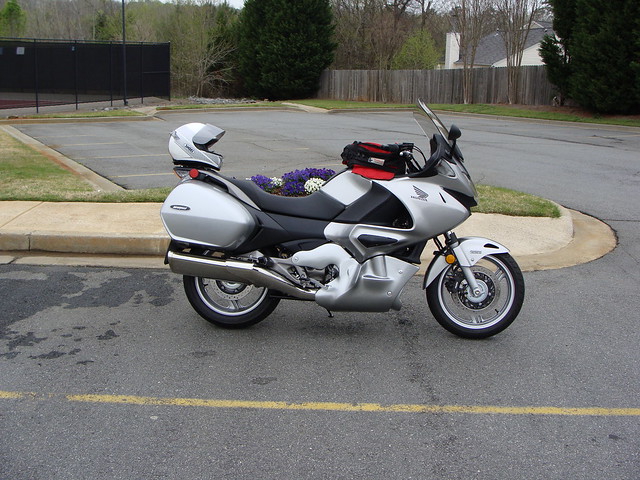
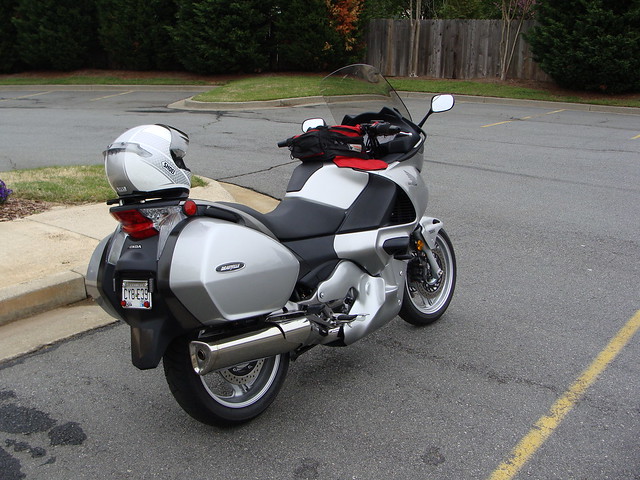
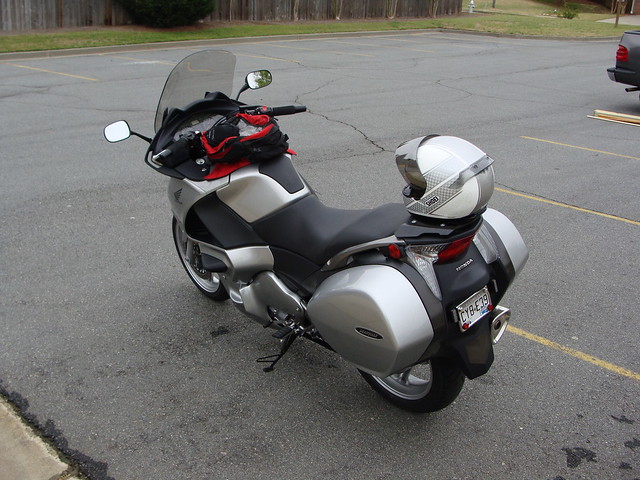
If you want to see a larger image, or more photos, just double click on any photo and it will take you to my Flickr account where these are hosted....
Let the "Cowl Wars" begin anew....
I purchased the Skidmarx Lower Cowl, had it color matched, and now have finally gotten installed and a test ride with it completed!
The cowl was very well packed and arrived in great shape. The fiberglass used is a very high quality and the outer gel coat was excellent. I play around with classic Corvettes and have seen a lot of fiberglass parts and Skidmarx gets very high marks from me for their quality. My body shop did not need to do much preparation work and was also impressed with the fiberglass quality.
The cowl arrives with a large bag of bolts, nuts, washers, brackets and minimalist instructions. That is the first area Skidmarx could improve on in my opinion. However after I sat down at the kitchen table and divided everything up in to the appropriate "piles" it made sense. Follow the instructions and you will be fine...
A few installation tips:
1. The heat shield insulation provided with the kit is a total PITA! It is supposedly self adhesive but it does not want to stick, even to its self! I will be buying some better heat shielding and installing it as the supplied stuff is not going to stay in place long. Reynolds Wrap and Gorilla Snot (Glue) would work better!
2. There has been a lot of questions about radiator hose clearance, or lack there of, on different cowls. The Skidmarx lower subframe easily clears all the hoses as long as you run its mounting bolt from left to right. This means you have to fish the long bolt through the hoses but it can be done with a little patience.
3. The supplied directions say to mount both the left side and ride side units prior to tightening the lower subframe bolt. Save yourself a lot of aggravation and just align it and tighten it with the right side off, left side on. I have a fairly well stocked tool set and there was no way I could get a wrench or socket behind the exhaust to tighten the nut with the right side attached.
4. You will need a good set of metric Allen wrenches. I think I used five different sizes of Allen wrenches and a 10MM socket and combination wrench to put it all together.
How does it work? Very well! I just got from a nice ride and the amount of wind around my lower legs was greatly reduced. It mounts in such a way you don't notice it when riding as it easily clears my jungle boots (10 1/2 EEE sized).
How does it look, well looks are subjective so here are a few photos for you to decide...


If you want to see a larger image, or more photos, just double click on any photo and it will take you to my Flickr account where these are hosted....
Let the "Cowl Wars" begin anew....
Last edited by a moderator:

 It is as Phil stated, being the diplomatic guy that he is, "a more complex look"...
 Deauville forum say this beats the Honda version hands down...and they ride in the rain a lot more than I ever will.